

Hey there! As a supplier of KNE Thermocouple Head, I often get asked about how to install these nifty little devices on a surface. So, I thought I'd put together a blog post to walk you through the process step by step.
First things first, let's talk about what a KNE Thermocouple Head is and why you might want to use one. A thermocouple is a temperature sensor that consists of two different metals joined together at one end. When there's a temperature difference between the joined end (the measuring junction) and the other end (the reference junction), it generates a voltage. The KNE Thermocouple Head is designed to house the thermocouple wires and provide a connection point to other devices, like data loggers or temperature controllers.
What You'll Need
Before you start the installation process, it's important to gather all the necessary tools and materials. Here's a list of what you'll typically need:
- KNE Thermocouple Head: Obviously, you'll need the main component itself. Make sure you've got the right model for your specific application.
- Thermocouple Wires: These are the wires that will connect the thermocouple to the head. You'll want to choose the appropriate type and gauge for your setup.
- Mounting Hardware: Depending on the surface you're mounting the thermocouple head on, you might need screws, bolts, or adhesive.
- Wire Strippers: To strip the insulation off the thermocouple wires so you can make the connections.
- Screwdriver: For tightening any screws on the thermocouple head or mounting hardware.
- Multimeter: This is optional but can be really useful for testing the thermocouple before and after installation to make sure it's working properly.
Step 1: Prepare the Surface
The first step in installing the KNE Thermocouple Head is to prepare the surface where you'll be mounting it. This is crucial because a proper surface will ensure a stable and accurate temperature measurement.
- Clean the Surface: Use a clean cloth and some mild detergent to wipe down the surface. Remove any dirt, grease, or debris that could interfere with the mounting.
- Check for Flatness: The surface should be as flat as possible. If it's not, you might need to use a shim or sand it down to create a flat area.
- Mark the Mounting Holes: If the thermocouple head has mounting holes, use a pencil or marker to mark the locations on the surface. Make sure the marks are accurate and aligned.
Step 2: Mount the Thermocouple Head
Once the surface is prepared, it's time to mount the KNE Thermocouple Head.
- Align the Head: Place the thermocouple head on the marked surface and make sure it's aligned correctly. If there are mounting holes, line them up with the marks you made earlier.
- Secure the Head: Use the appropriate mounting hardware to secure the thermocouple head to the surface. If you're using screws, make sure they're tightened securely but not over-tightened, as this could damage the head.
Step 3: Connect the Thermocouple Wires
Now comes the part where you connect the thermocouple wires to the KNE Thermocouple Head.
- Strip the Wires: Use the wire strippers to carefully strip about 1/4 to 1/2 inch of insulation off the ends of the thermocouple wires. Be careful not to nick or damage the wires themselves.
- Identify the Wires: Thermocouple wires usually come in two different colors to indicate the positive and negative leads. Make sure you know which wire is which before making the connections.
- Connect the Wires: Open the terminal block on the thermocouple head. Insert the stripped ends of the thermocouple wires into the appropriate terminals and tighten the screws to secure the connections. Make sure the connections are tight and there's no loose wire.
Step 4: Choose the Right Connector
The KNE Thermocouple Head can be connected to other devices using different types of connectors. Two common options are the Standard K Type Connectors and the Mini K Type Connector.
- Standard K Type Connectors: These are larger and more robust, making them suitable for applications where you need a reliable and secure connection. They're often used in industrial settings.
- Mini K Type Connector: As the name suggests, these are smaller and more compact. They're great for applications where space is limited, like in some laboratory equipment.
Choose the connector that best suits your needs and connect it to the thermocouple head according to the manufacturer's instructions.
Step 5: Test the Installation
After you've completed the installation and connected the thermocouple head to the appropriate device, it's time to test it.
- Power On the Device: Turn on the power to the device that's connected to the thermocouple head.
- Check the Readings: Use a multimeter or the device's built-in display to check the temperature readings. Compare the readings to a known temperature source to make sure they're accurate.
- Look for Any Issues: Check for any signs of loose connections, short circuits, or other problems. If you notice any issues, double-check your installation and make the necessary adjustments.
Tips and Tricks
- Use Heat Sink Compound: If you're mounting the thermocouple head on a hot surface, applying a thin layer of heat sink compound between the head and the surface can improve the heat transfer and accuracy of the temperature measurement.
- Protect the Wires: Use cable ties or conduit to protect the thermocouple wires from damage. This will help prevent any interference with the temperature readings.
- Follow the Manufacturer's Instructions: Always refer to the manufacturer's instructions for the specific model of the KNE Thermocouple Head you're using. They may have additional installation guidelines or precautions.
Conclusion
Installing a KNE Thermocouple Head on a surface isn't too difficult if you follow these steps. By preparing the surface, mounting the head correctly, connecting the wires properly, choosing the right connector, and testing the installation, you can ensure accurate and reliable temperature measurements.

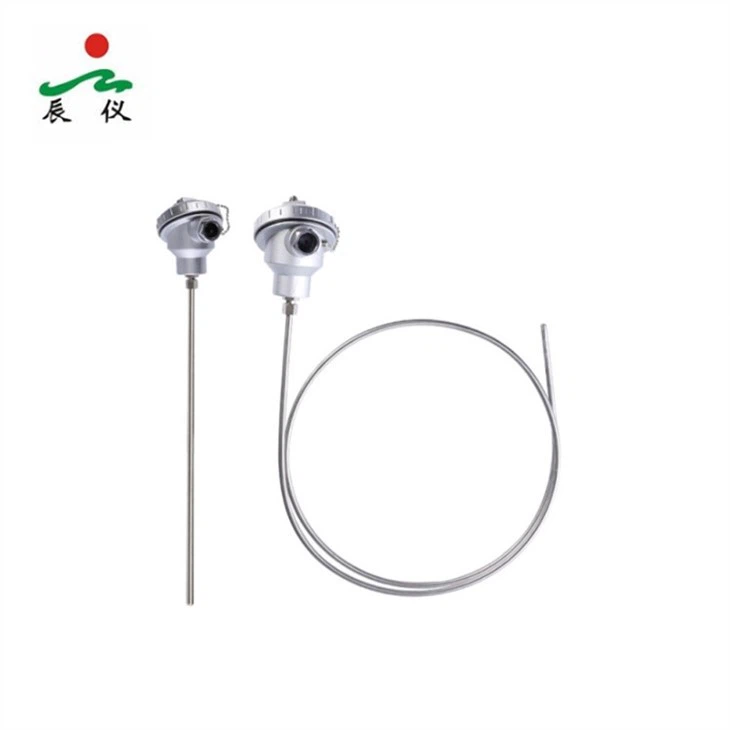
If you're interested in purchasing KNE Thermocouple Heads or have any questions about the installation process, feel free to reach out to us. We're here to help you find the right solution for your temperature sensing needs.
References
- General knowledge of thermocouple installation and temperature sensing technology.
- Manufacturer's documentation for KNE Thermocouple Head, Standard K Type Connectors, and Mini K Type Connector.
