

Hey there! I'm a supplier of Cement Thermocouples, and today I'm gonna walk you through the process of installing a cement thermocouple in a cement vertical mill. Whether you're a seasoned pro in the cement industry or just getting started, this guide will give you the lowdown on how to get the job done right.
Why Use a Cement Thermocouple?
Before we dive into the installation process, let's quickly talk about why a Cement Thermocouple is so important in a cement vertical mill. In a cement vertical mill, temperature control is crucial. The grinding process generates a lot of heat, and if the temperature gets too high, it can damage the mill and affect the quality of the cement. A cement thermocouple measures the temperature accurately, allowing you to monitor and adjust the process to keep everything running smoothly.
Tools and Materials You'll Need
- Cement Thermocouple: Obviously, you'll need the right thermocouple for the job. Make sure it's suitable for the high temperatures and harsh conditions in a cement vertical mill.
- Wrenches: You'll need a set of wrenches to loosen and tighten bolts and nuts.
- Drill and Bits: If you need to make holes for the thermocouple installation, a drill and appropriate bits will be necessary.
- Sealant: To prevent any leaks around the thermocouple, you'll need a high - temperature sealant.
- Safety Gear: This includes safety glasses, gloves, and a hard hat to protect yourself during the installation process.
Step - by - Step Installation Process
Step 1: Preparation
First things first, safety is key. Put on your safety gear before you start working. Then, shut down the cement vertical mill and let it cool down completely. This is crucial to avoid any burns or injuries. Once the mill is cool, clean the area where you'll be installing the thermocouple. Remove any dust, debris, or old sealant.

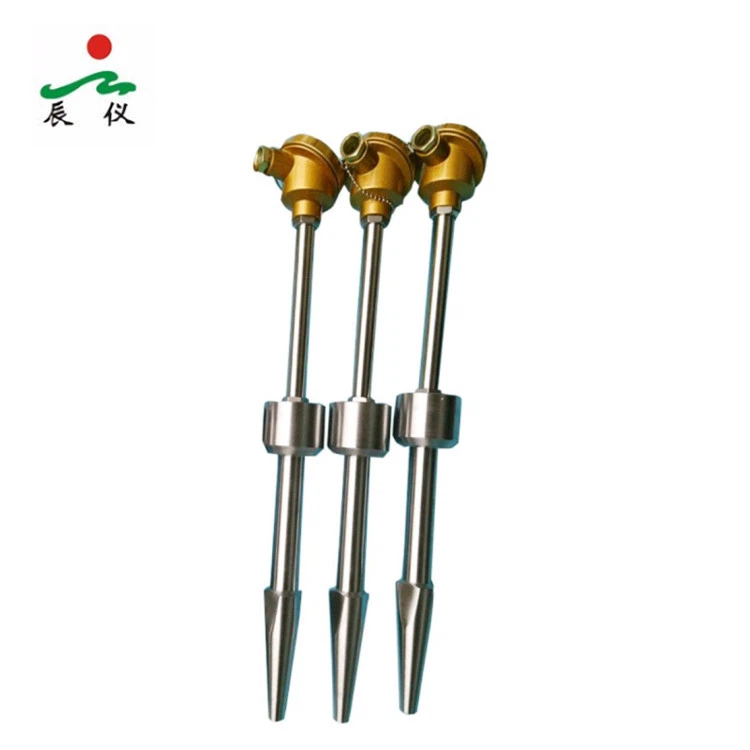
Step 2: Locate the Installation Point
The next step is to find the right place to install the thermocouple. The ideal location is where it can accurately measure the temperature of the material being ground. Usually, this is near the grinding area or in the air duct. Check the mill's manual or consult with an expert if you're not sure where to place it.
Step 3: Drill Holes (if necessary)
If the installation point doesn't already have a hole for the thermocouple, you'll need to drill one. Use the appropriate drill bit size for your thermocouple. Make sure the hole is straight and clean. After drilling, use a wire brush to remove any burrs or debris from the hole.
Step 4: Insert the Thermocouple
Carefully insert the thermocouple into the hole. Make sure it fits snugly. If there's a gap between the thermocouple and the hole, use the high - temperature sealant to fill it. Apply the sealant evenly around the thermocouple to prevent any air or dust from leaking in.
Step 5: Secure the Thermocouple
Once the thermocouple is inserted, use the wrenches to tighten the mounting nuts or bolts. Don't over - tighten them, as this could damage the thermocouple. Make sure the thermocouple is firmly in place but still has some flexibility.
Step 6: Connect the Wires
Connect the thermocouple wires to the temperature monitoring system. Follow the wiring diagram provided with the thermocouple and the monitoring system. Double - check the connections to ensure they're secure.
Step 7: Test the Thermocouple
After the installation is complete, power on the mill and the temperature monitoring system. Check if the thermocouple is working properly by observing the temperature readings. If there are any issues, such as incorrect readings or no readings at all, check the connections and the thermocouple itself.
Other Types of Thermocouples
In addition to the Cement Thermocouple, we also supply other types of thermocouples that might be useful in different applications. For example, the Right Angle Thermocouple is great for tight spaces where a regular thermocouple won't fit. And the Power Plant Thermocouple is designed for the high - temperature and high - pressure environments in power plants.
Troubleshooting Tips
- Incorrect Temperature Readings: If the thermocouple is giving incorrect readings, it could be due to a loose connection, a damaged thermocouple, or interference from other electrical equipment. Check the connections first, and if that doesn't solve the problem, test the thermocouple with a multimeter.
- Leakage: If you notice any leaks around the thermocouple, it could be because the sealant wasn't applied properly or has deteriorated over time. Remove the old sealant and re - apply a new one.
- Physical Damage: If the thermocouple is physically damaged, such as a bent probe or broken wires, it will need to be replaced.
Conclusion
Installing a cement thermocouple in a cement vertical mill might seem like a daunting task, but if you follow these steps and take the necessary precautions, it can be done safely and effectively. Remember, accurate temperature measurement is essential for the efficient operation of the mill and the quality of the cement.
If you're in the market for a high - quality cement thermocouple or any other type of thermocouple, feel free to reach out to us. We're here to help you find the right solution for your needs. Whether you have questions about installation, troubleshooting, or just want to learn more about our products, don't hesitate to contact us for a purchase and negotiation.
References
- Cement Industry Handbook
- Thermocouple Installation Guide
